Backward Design Lesson Plan: A Practical Guide for K-12 Teachers
Backward design flips traditional lesson planning on its head. Start with the results you want, work backward to the assessment, then plan the activities. Here is how to do it without burning a weekend.
Draft My Lesson Team
Lesson planning often starts with an activity: a useful video, a simulation, or a worksheet that worked last year. Wiggins and McTighe described the risk as activity-oriented planning. Students stay busy, but the link between what they do and what they actually learn can remain unclear.
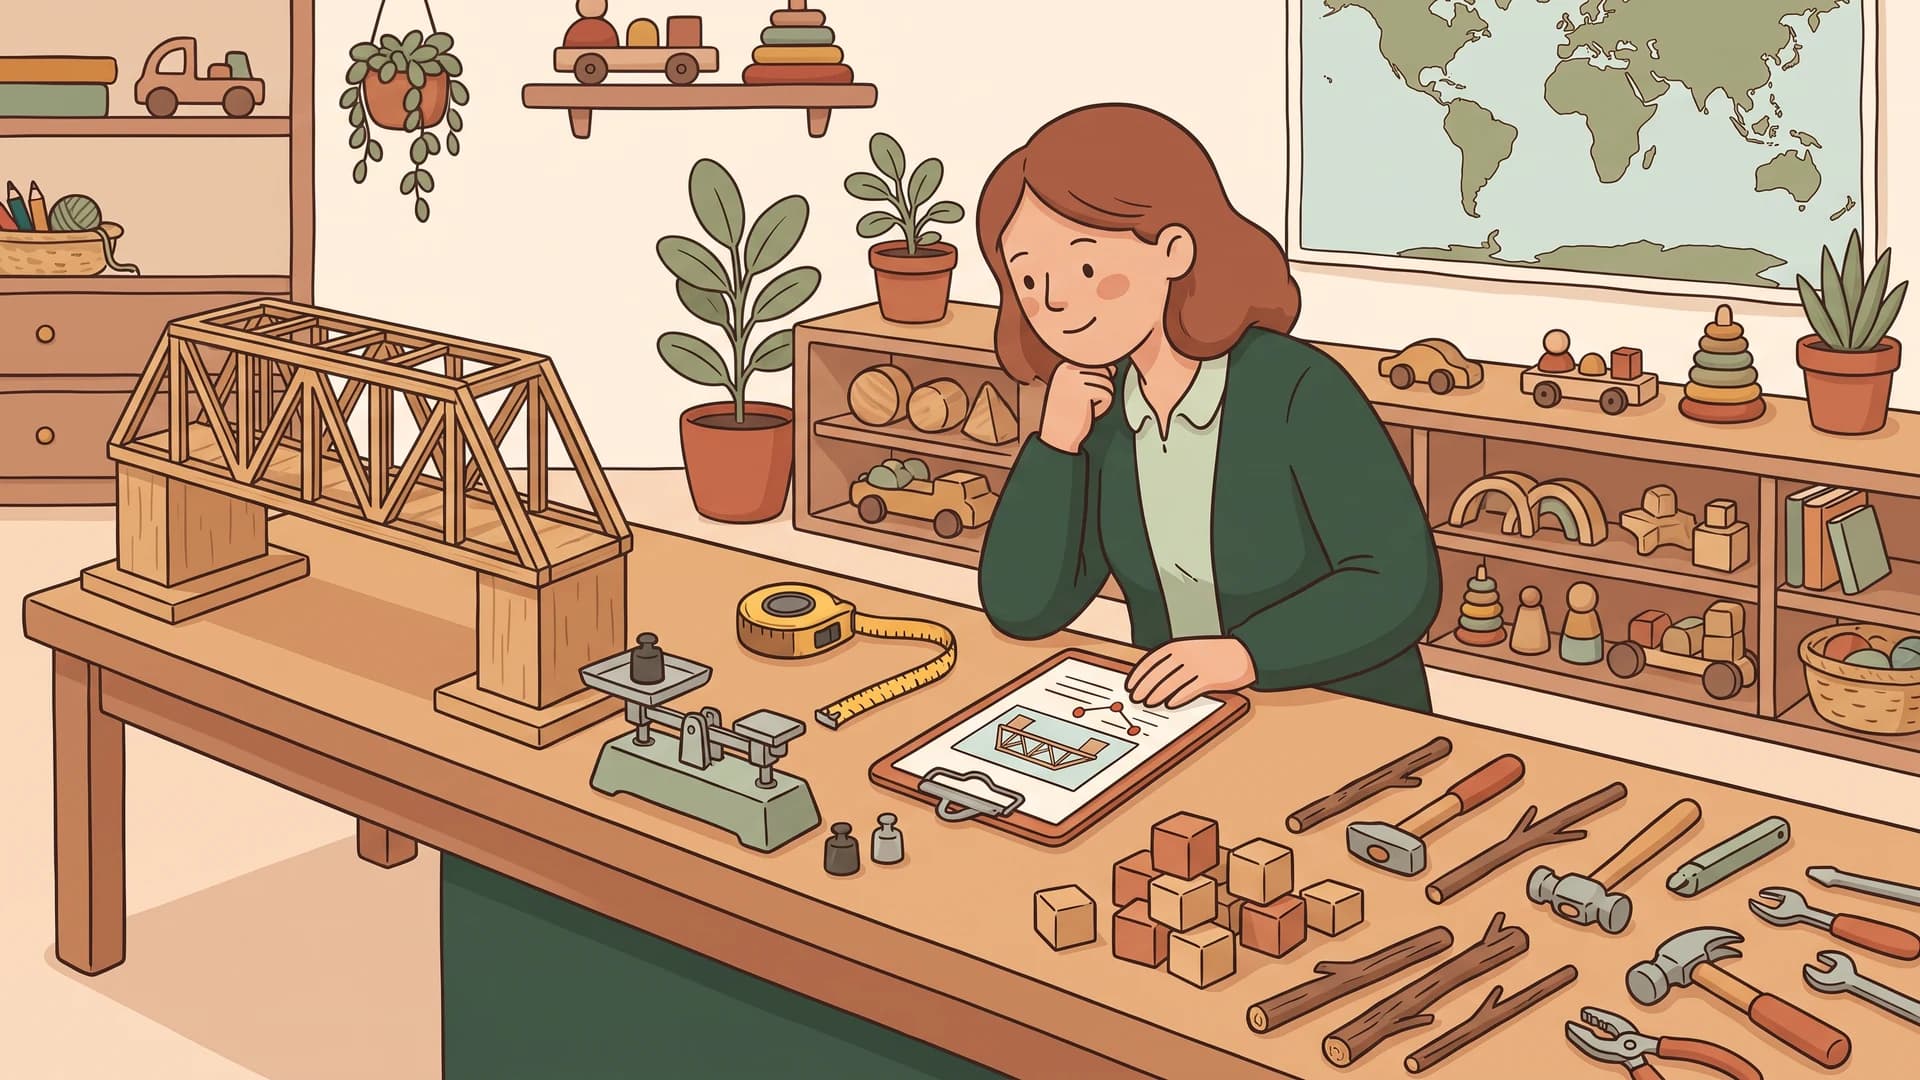
Backward design fixes this by asking three questions in a stubbornly specific order. What do I want students to truly understand by the end? What evidence would prove they understand it? And only then: what learning experiences will get them there? It is the same logic an engineer uses when designing a bridge. You do not start with the steel. You start with the load it has to carry.
The framework is common in instructional-design and teacher-education courses. This guide focuses on applying it without turning the planning document into the project.
Key takeaways
- Backward design has three stages, in this order: desired results, acceptable evidence, learning plan.
- The framework was formalized by Grant Wiggins and Jay McTighe in Understanding by Design (ASCD, 1998; expanded second edition, 2005).
- It costs more time upfront and saves you from the "we ran out of time before the test" trap.
- Use it for unit planning, not for every single lesson. The math does not work otherwise.
What backward design is (and the problem it solves)
Backward design is a unit and curriculum planning model in which the teacher identifies learning goals first, decides how those goals will be assessed, and only then designs the day-to-day activities. The original formulation comes from Grant Wiggins and Jay McTighe, who published Understanding by Design through ASCD in 1998 and expanded it in 2005. The framework is sometimes shortened to UbD.
The problem it solves is older than the framework. Veteran teachers know the pattern: you spend three weeks on a unit, students enjoy the activities, then the test arrives and the scores tell a different story. The activities were engaging, but they were not aligned to the outcomes. Or worse, the outcomes were never spelled out in the first place. Wiggins and McTighe described two failure modes that flow from this: activity-focused teaching (busy work disconnected from understanding) and coverage-focused teaching (racing through the textbook with no time to dig in).
Traditional forward design starts with the textbook chapter or the activity, then bolts on objectives and assessments at the end. Backward design inverts the sequence. The University of Illinois Chicago's Center for the Advancement of Teaching Excellence frames the contrast bluntly: forward design asks "what will I teach?" while backward design asks "what do I want students to be able to do, and how will I know they can do it?" The shift sounds small. In practice it changes everything about how you allocate class time.

The three stages of backward design
The framework has exactly three stages. Skipping or compressing any one of them defeats the purpose.
Stage 1: Identify desired results
This is where you decide what students will know, understand, and be able to do at the end of the unit. It has three layers, and most teachers stop at the first one.
Knowledge and skills are the surface layer: vocabulary, dates, formulas, procedures. These are easy to list and easy to test. They are also the most quickly forgotten.
Enduring understandings are the big ideas you want students to still hold five years from now. Wiggins and McTighe defined these as "important ideas or core processes that are central to a discipline and have lasting value beyond the classroom." For a unit on the Civil Rights movement, an enduring understanding might be: "Social change requires both moral arguments and strategic pressure on institutions." That sentence is not a date or a name. It is a claim about how the world works.
Essential questions are the open-ended questions that drive inquiry through the unit. They have no single right answer, they recur across grades and disciplines, and they make students argue. "Was the Civil Rights movement a success?" is essential. "When did the Montgomery Bus Boycott begin?" is not. The Kent State Center for Teaching and Learning maintains a useful checklist for vetting essential questions: they should be arguable, recurring, and require evidence to answer.
You also align Stage 1 to the official standards adopted for your class. Depending on the US state and subject, that may mean the Common Core State Standards, NGSS, C3, state-specific standards, or a local alternative. Verify the jurisdiction rather than copying a code from an example.
Stage 2: Determine acceptable evidence
This is the stage that most distinguishes backward design from regular planning. Before you decide what students will do in class, you decide how you will know they have learned. Wiggins and McTighe ask teachers to "think like an assessor, not like an activity designer."
The evidence usually combines two kinds of assessment. A performance task asks students to apply their learning in a complex, often authentic situation: write a Supreme Court brief, design a campaign, defend a thesis. A set of supporting evidence includes quizzes, exit tickets, observations, and homework that confirm the building-block knowledge is in place.
A performance task is strong when it meets the GRASPS criteria (Goal, Role, Audience, Situation, Product, Standards) that McTighe described in his planning templates. The product should require students to demonstrate the enduring understanding, not just recall facts.
You also write the rubric at this stage, not after the lesson. If you cannot describe what proficient work looks like before students start the unit, you do not yet know what you are teaching. For more on building the assessment scaffold around a unit, see our guide to assessment types every teacher should know.
Stage 3: Plan learning experiences and instruction
Only now do you design the day-by-day activities. Every activity should be traceable to a desired result and to the evidence you committed to in Stage 2. If an activity does not serve either, it gets cut, no matter how fun it is.
McTighe and Wiggins offer the WHERETO acronym as a planning check:
- W: Where is the unit going, and why?
- H: How will you hook and hold student interest?
- E: Equip students with the knowledge and skills they need.
- R: Provide opportunities to rethink and revise.
- E: Allow students to evaluate their own work.
- T: Tailor for individual differences.
- O: Organize for maximum engagement and effectiveness.
The Cult of Pedagogy primer on backward design frames this as the "no orphan activity" rule. Every activity has a parent (a desired result) and a sibling (the evidence it builds toward).
Free backward design template (Word and PDF)
Download a blank three-stage unit template: backward design template in Word (editable) or as a PDF. No account is needed. Page 1 holds Stage 1 (established goals, understandings, essential questions, knowledge and skills) and Stage 2 (performance task, success criteria and other evidence). Page 2 is the Stage 3 learning plan: one row per lesson, each linked to the goal it serves and the evidence it prepares, with a WHERETO checklist.
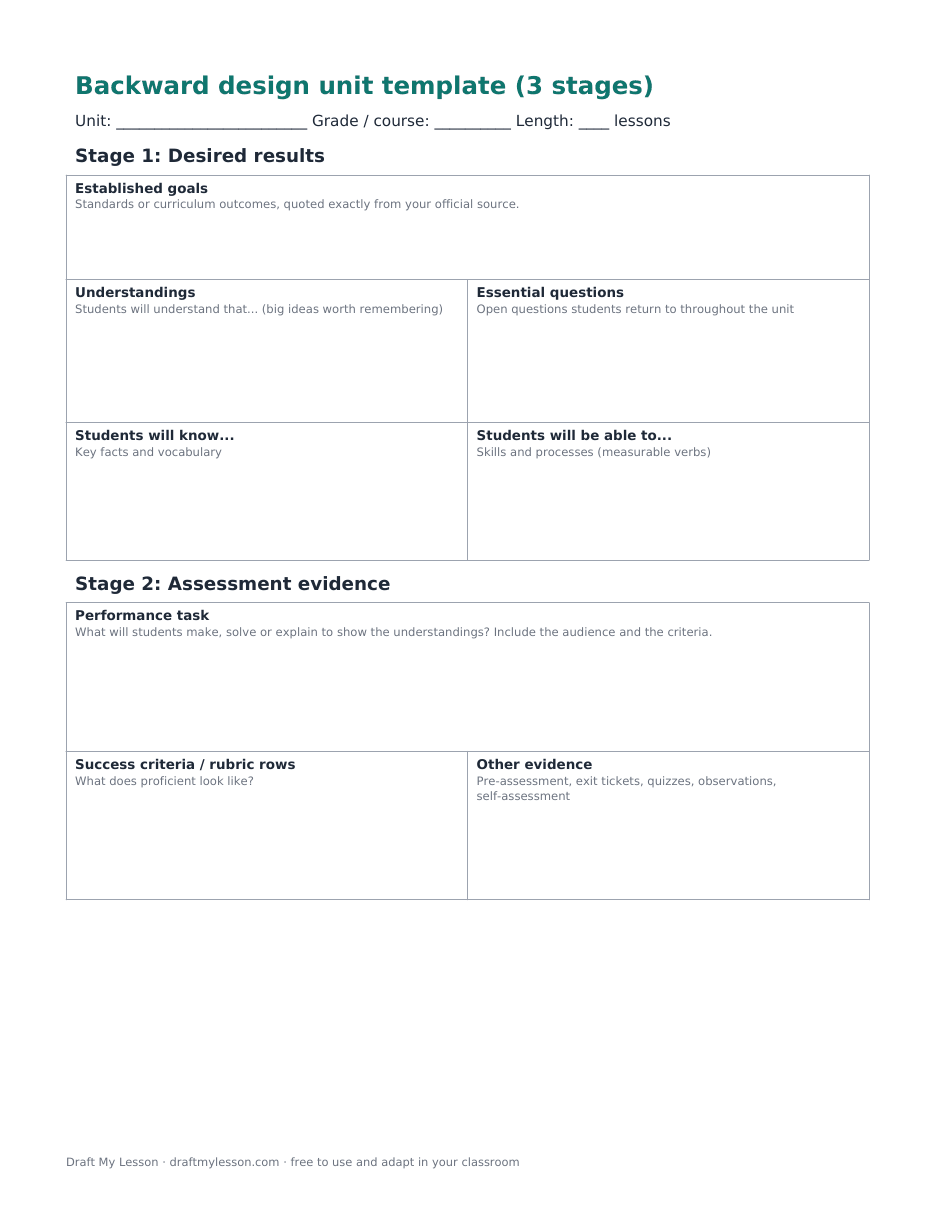
Looking for a UbD template? The layout follows the three stages and the WHERETO elements described by Wiggins and McTighe, so it works for teacher-education assignments that ask for an Understanding by Design unit. It is an independent template, not the official one: Understanding by Design® and UbD™ are trademarks of ASCD. If your program requires the official form, use the version your instructor provides and treat this one as a drafting copy. In Google Docs, upload the Word file to Drive and open it with Google Docs.
Copyable backward design canvas
Prefer plain text? Use one canvas per unit. Keep Stage 1 short enough to guide decisions and Stage 2 specific enough that two teachers would score the same work similarly.
Copyable text
Copy includes the complete text. No signup needed.
UNIT / GRADE / DURATION:
OFFICIAL STANDARD OR CURRICULUM REFERENCE (verify locally):
STAGE 1: DESIRED RESULTS
Students will know:
Students will be able to:
Enduring understanding:
Essential question:
Show full textShow less
STAGE 2: ACCEPTABLE EVIDENCE
Performance task:
Other evidence:
Success criteria or rubric rows:
What would count as a misconception:
STAGE 3: LEARNING PLAN
Day / activity / evidence it prepares:
1.
2.
3.
4.
Support and extension:
Revision or reteach point:
For the daily lessons inside Stage 3, use a lesson plan template. Once Stage 1 and Stage 2 are fixed, you can open the lesson generator to draft activity options, then keep only the ones that build the evidence you named.
A full backward-designed lesson plan: 10th grade Civil Rights unit
Here is a 4-day unit on the Civil Rights movement, designed using the three stages. Total instructional time: roughly 4 hours and 20 minutes across four 65-minute periods.
Stage 1: Desired results
Enduring understandings:
- Social movements succeed when moral arguments are paired with sustained strategic pressure on institutions.
- Nonviolent resistance is a deliberate political technique, not a passive posture.
- Legal change and cultural change move on different timelines.
Essential questions:
- Why did the Civil Rights movement succeed in 1964 when earlier efforts had not?
- Was the Civil Rights movement a success?
Knowledge: Brown v. Board, Montgomery Bus Boycott, Birmingham campaign, March on Washington, Civil Rights Act of 1964, Voting Rights Act of 1965, key figures including King, Parks, Lewis, Bates, Baker.
Skills: Source analysis, claim-evidence-reasoning writing, comparative argument.
Stage 2: Acceptable evidence
Performance task (GRASPS): Students take the role of a strategist advising a present-day social movement of their choice. They write a 600-word memo arguing what tactics from the 1955-1965 period the movement should adopt, and which should be left in the past. The memo must cite at least three specific events from the unit and explain why each tactic worked or failed in its original context.
Rubric criteria: historical accuracy (25%), application of enduring understanding (35%), use of evidence (25%), writing quality (15%). Proficient work names a specific tactic, ties it to an outcome, and explains the mechanism, not just the chronology.
Supporting evidence: Daily exit tickets, a midweek source-analysis quiz on a primary document, a peer review of memo drafts.
Stage 3: Learning plan
| Day | Activity | What it builds toward |
|---|---|---|
| 1 | Hook with two contrasting photos (1955 lunch counter, 1963 March on Washington). Establish essential questions. Read Brown v. Board excerpt and a 1956 newspaper response side by side. Exit ticket: name one thing the photo could not tell you. | Hooks the essential question, surfaces the legal vs cultural distinction. |
| 2 | Direct instruction on Montgomery and Birmingham. Students annotate a King "Letter from Birmingham Jail" excerpt for moral arguments vs strategic claims. Source-analysis quiz. | Builds the knowledge base and the claim-evidence skill the memo will require. |
| 3 | Jigsaw on the March on Washington, Freedom Summer, and Selma. Each group answers: what specific institutional pressure did this event create? Students draft memo thesis and one body paragraph. | Generates the comparative evidence the performance task needs. |
| 4 | Peer review of drafts using the rubric. Mini-lesson on counterargument. Students revise. Closing Socratic seminar on essential question 2: was the movement a success? | Final revision and oral defense of the enduring understandings. |
The memo is collected the day after Day 4. Notice that the Socratic seminar on the last day is not decorative. It is the second piece of evidence on the enduring understanding, and it gives students who write less fluently a second way to demonstrate it.
Classroom evidence pack for the four-day example
The unit above names the goal, assessment and activities. The materials below show what students can analyze and what a teacher can look for before the final memo. They are original context summaries and teaching prompts, not primary-source quotations or a tested lesson. Select and check age-appropriate primary sources before using the full unit.
- Student evidence sheet (editable Word) and printable PDF
- Teacher guidance and annotated response (editable Word) and printable PDF
Three context cards: law, action and legislation
A. A court ruling, 1954. In Brown v. Board of Education, the US Supreme Court ruled that racial segregation in public schools violated the Constitution. The ruling changed the legal position; implementation still had to follow.
B. A sustained boycott, 1955–56. After Rosa Parks was arrested in Montgomery, Black residents and allies organized a bus boycott. They arranged alternative transport and maintained collective pressure over many months. Legal challenges to bus segregation proceeded as well.
C. Federal legislation, 1964. The Civil Rights Act of 1964 created federal protections in several areas, including public accommodations and employment. It followed years of organizing, advocacy and legislative struggle.
These are teacher-written secondary summaries. The Library of Congress Civil Rights Movement classroom set provides primary sources and source context for a teacher to select. Check each source's date, provenance, reading level and classroom permissions.
Student analysis sheet
Ask students to explain the mechanism in each card: what can a court ruling, collective action or a federal law change? Then use the grid in the downloadable sheet. Its four columns are case, detail showing a change, what still needed to happen, and a source that could test the conclusion. The final prompt is: “Why was a single legal decision unlikely to complete the work of change?” Students make one claim, use details from two cases or checked primary sources, and explain the connection. Listing dates alone does not meet that target.
Annotated response and next teaching move
The Brown ruling changed the law on segregated public schools, but communities and authorities still had to implement it [accurate Card A detail and limit]. In Montgomery, residents sustained a boycott while a separate court challenge proceeded [Card B shows organized action and law together]. These examples suggest that a legal decision can establish a right while organized people and institutions determine how it is put into practice [reasoned inference, not a fact from one card].
This is one defensible model, not the only answer. If a response lists events without a mechanism, ask how a particular action affected an institution or decision. If a student claims one tactic guaranteed success, ask for a limiting condition. If they rely only on the summaries, compare one teacher-checked primary source with the card and ask what it adds or complicates.
| Criterion | Starting | Developing | Secure | Extending |
|---|---|---|---|---|
| Historical accuracy | Confuses cases or outcomes | Names events but blurs mechanisms | Distinguishes ruling, action and legislation | Adds a justified limit or interaction |
| Evidence | No relevant detail | One unexplained detail | Two accurate details from different cases, explained | Compares source strengths or limits |
| Reasoning and transfer | Assertion or modern analogy only | Describes sequence | Explains how a tactic affected an institution or decision | Qualifies what differs in another context |
Use the grid and paragraph as formative evidence before the final strategy memo. The rubric is a feedback aid, not a validated assessment. When students compare a historical tactic with a present-day issue, require them to name at least one contextual difference instead of assuming the situations are identical. For planning the next lesson from the evidence, start a Draft My Lesson draft and check it against your own goal and sources.
How to apply backward design without burning out
The honest tradeoff: a well-designed UbD unit takes more upfront time than a forward-designed one. McTighe and Wiggins acknowledged this openly. Their argument was that the time is recovered later, in fewer reteach days and stronger summative results. That is true. It is also true that you cannot do a full Stage 1, 2, 3 cycle for every single lesson in a school year. Anyone who tells you otherwise has not actually tried it.
Practical rules of thumb from teachers who use the framework long-term:
Plan at the unit level, not the lesson level. The three stages earn their space when several lessons build toward shared evidence. For a single 45-minute lesson, a short objective-assessment-activity sequence may be enough.
Reuse Stage 1 across years. Your enduring understandings for the Civil Rights movement should not change much from year to year. Write them once, refine them annually, and stop reinventing them.
Co-plan when you can. Department or grade-level teams can split the Stage 1 and Stage 2 work. One teacher drafts the performance task, another drafts the rubric, a third gathers supporting evidence sources. You converge in a 90-minute meeting and walk out with a unit shell everyone can adapt.
Use AI as a Stage 3 accelerator, not a Stage 1 substitute. AI lesson tools, including Draft My Lesson, are excellent at generating activity options, differentiated handouts, and exit tickets once you have committed to your desired results and evidence. They are not a shortcut for deciding what students should understand. That decision is yours, and it has to come first.
Keep a template. A reusable two-page template with Stage 1, Stage 2, and a daily learning plan table prevents you from rebuilding the structure each time. Several universities, including East Carolina's Teaching Toolkit, publish free templates you can adapt.
For a primer on the activity-design side, our parts of a lesson plan guide complements the Stage 3 work. For writing the desired-results layer, lesson plan objectives and our Bloom taxonomy guide give you the vocabulary.

When backward design is worth the effort (and when it isn't)
Backward design is not a universal best practice. It is a particular tool for particular jobs.
It is worth the effort when:
- You are planning a new unit you will teach for multiple years.
- The unit aims at conceptual understanding, not just skill drill.
- You have flexibility over assessment design.
- Students consistently underperform on the summative assessment relative to how engaged they seemed during class. That is the classic activity-focused signal.
It is not the right tool when:
- You are teaching tightly scripted curricula where assessment is externally set and non-negotiable.
- The lesson is pure skill practice (multiplication facts, phonics drills, lab safety procedure). For those, a simple direct-instruction or gradual-release plan is usually more efficient. The lesson plan format comparison helps you choose.
- You have less than two hours of planning time and three weeks of content to cover. Be honest with yourself.
For another classroom-oriented perspective, Edutopia discusses using backward design to prioritize thinking rather than coverage in social studies and ELA.
Frequently asked questions
What is a backward design lesson plan?
A backward design lesson plan is a unit or lesson built in three stages, in this order: first you identify the learning results you want, then you decide what evidence would prove students reached them, and only then you plan the activities. The framework was developed by Grant Wiggins and Jay McTighe and is also called Understanding by Design.
What are the three stages of backward design?
Stage 1: Identify desired results, including enduring understandings, essential questions, and specific knowledge and skills. Stage 2: Determine acceptable evidence, including a performance task and supporting assessments. Stage 3: Plan learning experiences and instruction that lead students to that evidence.
What is the primary goal of backward design in curriculum development?
The primary goal is to align every activity in a unit to a clearly stated learning outcome, so that classroom time is spent on what actually moves students toward understanding rather than on activities that merely keep them busy. Wiggins and McTighe called the two common alternatives the "twin sins" of traditional design: activity-focused teaching and coverage-focused teaching.
What are the three steps of backward design?
The three steps map directly to the three stages above. Step 1: write desired results. Step 2: design assessments and evidence. Step 3: plan day-by-day instruction. The steps must be done in that order. Reversing them produces forward-design lesson planning, which is the practice the model was created to replace.
Is there a free Understanding by Design (UbD) template?
Yes. The backward design template on this page is a free Word and PDF unit template organized by the three UbD stages, with a WHERETO checklist for the learning plan. It is an independent template; the official Understanding by Design materials are published by ASCD.
What does WHERETO stand for in backward design?
WHERETO is the checklist Wiggins and McTighe use for Stage 3. W: help students know where the unit is going and why. H: hook and hold their interest. E: equip them and let them experience the key ideas. R: give chances to rethink and revise. E: let students evaluate their own work. T: tailor the plan to different needs. O: organize the sequence for understanding rather than coverage.
What is an example of backward planning?
Planning a 10th grade Civil Rights unit by first deciding that students should understand how moral and strategic pressure combine in social movements, then designing a memo where students apply that understanding to a current-day movement, then choosing the daily readings, jigsaw, and Socratic seminar that build toward that memo. A worked version of this example is in the section above.
Continue your lesson planning toolkit
Backward design works best when it sits inside a broader planning practice. Pair this guide with our complete how-to-write-a-lesson-plan walkthrough for the foundations, the lesson plan format library for templates, and differentiated instruction for adapting the Stage 3 learning plan to the students actually in your room. The framework rewards teachers who use it more than once. Your second unit will be easier than your first, and your fifth will feel natural.
Related articles
Bloom's Taxonomy Verbs: 150 Action Verbs by Level, With Question Stems
A complete list of Bloom's taxonomy verbs for the six revised levels, with question stems, sample objectives and a free printable verb chart.
Read articleUnit Plan Template: Free Editable Word and PDF, Plus a Filled-In Example
A free unit plan template in Word and PDF, with a complete Grade 5 science example: standards, big ideas, assessment evidence, an 8-lesson sequence and a rubric.
Read articleHow to Write a Lesson Plan: A 7-Step Guide for Teachers
A step-by-step method for writing a classroom-ready lesson plan in under 30 minutes, with three real K-12 examples and the components every plan needs.
Read articleLesson Plan Objectives: 3 Types, Bloom's Verbs, and ABCD Examples
The 3 objective types are cognitive, affective, and psychomotor. Use the free builder, Bloom's verb bank, and ABCD examples to write your own.
Read article